Sunday, September 29, 2019

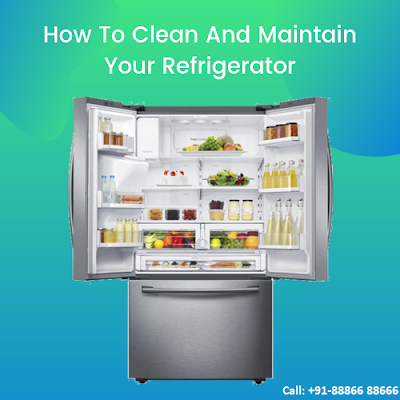
Cleaning and Maintenance Tips for your Refrigerator


A Refrigerator is a common appliance in every house. A contributing factor to refrigeration temperature is usually caused by a bad or dirty condenser coil most condenser coils are located under the front of a refrigerator on the bottom of the floor. Best Refrigerator Service Center by Doorstep Hub.

1. Clean the Coil.
The condenser coil can be accessed by removing the drill from the front of the refrigerator and clean it using a coil brush which designed to slide underneath the refrigerator from the front or rear or left or right be careful that you don't slide this brush too far to the rear because there's a condenser fan back there that you could contact and cause damage.

Do not be too vigorous or rough with the coil brush while you're cleaning the coil. Too vigorous or abrupt motions could cause damage to the condenser coil which could relate to a very expensive repair.

You simply take your coil brush and slide it under the refrigerator make access underneath the grill or the front of the grill and the brush is bendable so that you can make it fit and allocate the location that you need to for cleaning by sliding the brush front the back or left to right. You're simply going to pull out a lot of waste.

Once you clean the condenser coil from front to rear and left to right and you removed all of the brie which you vacuumed up with a vacuum and pull it out. Your condenser coil will be clean, make sure that you inspect tour refrigerator at least twice a year to make sure that coils stay clean for proper operation and proper temperatures in your refrigerator.

2.  Inspecting the Gasket
Another contributing factor to poor refrigeration is generally caused by the seal around the refrigerator or freezer door a visual inspection of the gasket around the refrigerator door or freezer should result in a nice smooth surface with no tears but the most important part of the gasket is a sidewall ceiling, if a tear occurred along the sidewall this can result in the heat intrusion into refrigerator liner or the freezer compartment. Heat intrusion and a refrigeration liner will result in moisture buildup on the shelves or in the crisper drawers and in the freezer compartment will actually result in frost build-up.

Make sure that you have no food or stickiness around the liner of the refrigerator. Stickiness results in the gasket sticking to it when you open the door and can result in tearing the door ceil.

Tip:
Here's a helpful tip at how to maintain the door seals on your refrigerator. You can apply petroleum jelly, apply the petroleum jelly down the face of the gasket from the top and also extend the sidewall of the gasket and apply the petroleum jelly through the side portion of the seal.

Cleaning and Maintenance Tips for your Refrigerator


3. Check Your Temperature
In most refrigerators, there are temperature settings and there are recommended settings that are arranged on the control board. However, the freezer compartment temperature setting needs to be adjusted to the consistency of the way you like to get ice cream out of the container. 

Note: we only want the freezer compartment to as cold as necessary to freeze the products.
You set your freezer compartment temperature one degree at a time.

After you adjust the freezer compartment temperature you simply then start beginning to adjust your refrigerator compartment temperature to the way they like the temperature of your beverages. Once this has done you have adjusted your refrigerator and freezing apartment temperature to make refrigerator run as long as necessary for you as a homeowner.

4. Replace the Water Filter
If your refrigerator is equipped with a water filter it's recommended that filter be changed out every 6 to 12 months. Most of the homes are on a public water supply which should only result in having to replace that filter by the 12 month period. However, there are some homes that are on a drilled well we call it foreign water that water filter should be replaced out by the six-month term.

A good indicator when need to be changed out sooner or later is by water flow when you're filling your glass if there's a reduction in that water flow or you notice a reduction in your ice-making production usually it's an indicator that water filter should be changed.

You may not realize whether or not your refrigerator is equipped with a water filter you should consult your owner's manual to determine this. Just because your refrigerator may not have a water dispenser in it for obtaining water. A water filter is necessary for most refrigerators today just for filtering the ice.


Are you facing a problem with your refrigerator, we at doorstep hub gives the best service for all types of Refrigerator Repair. Call our customer service center at +91-88866 88666.
 

Friday, September 27, 2019

How can I buy a good washing machine? Washing repair service


When you start doing research for the best washing machines, there are a few things you need to consider.


  • Type of washing machine you would like to prefer
  • The space you have available 
  • Capacity 
  • Desired features

Here we are going to talk through the four considerations you need to review when shopping for your next washing machine.

Type of the washing machine, you would like to prefer
To start you have to decide on a type of washing machine you want. When comes to washer you have two main types a top- load washer or front load washer.

Type of the washing machine


1. Top load washing machines

Top load washing machines are of two types

  • Semi-Automatic 
  • Fully – automatic

Semi-Automatic:

  • Semi-automatic machines have two separate drums switches for washing and for drying.
  • You have to manually remove the clothes from the washing section and put it in the drying section.
  • The good part is that these machines are cheaper compared to automatic machines .they is easier to repair and they are also quite easier to operate.  

Fully–Automatic:

  • Top load washing machines have agitators that cost less and are faster than a top-load machine without an agitator, otherwise known as H.E or high-efficiency washing machines.
  • The lack of agitator means the machine will be a gentle bit on your clothes. It also allows more capacity or space inside the machine but despite having a large capacity most H.E washers actually use less water, they also spin faster removing more water which cuts back on dry times.
  • Although the high spinning can sometimes tangle on your clothes. So make sure you're stuck in any strings or straps. 
  • When shopping, make sure you reach into the machine and pretend you are trying to grab that last sock at the bottom.
  • Top loaders can be very deep and sometimes people have trouble reaching all the way into them.


2. Front Load Washing Machine 

  • Front-load washing machines tend to be a little more expensive but they clean better and gentler than the best H.E top loaders.
  • Front-loaders take longer to clean loads but spin faster extracting more water and trimming down your dryer time.
  • The high spin speed can cause some washing machines to vibrate so make sure you look for a unit with an anti-vibration technology.
  • Also, note that some of the front load washing machines collect water around the rubber door gaskets and that can develop mold. To prevent this from happening simply leave the door open a crack when you are done using.

Available Space:
The next important consideration is how much space you have available. Front-load washing machines are smaller when compare with Top load washing machine.
If you are planning to enclose your washing machine in a closet keep in mind you need 6 inches behind the machine hookups and venting.
 
Capacity:
The amount of laundry you do on the average size of your laundry basket. If you do plan washing lots of big bulky items then look for a machine that will hold that.
If you only need space for around eight to twelve full-sized towels or there’s only a couple of people in the household look for a machine with smaller capacities.

Desired features:
Consider the features you want for your washing machines but keep in mind the more features the higher the price. The key is to choose a high performing washing machine just under your budget.

If you need any type of Washing repair service, contact Doorstep Hub and get the service on the same day.

Thursday, September 26, 2019

Why does my TV have no picture? LG TV repair


TV is one of the most common appliances in every home. T.V is the source of fun, entertainment, and communication. One can get time to time information around the world by watching TV. Best LG TV Repair Service center provided by Doorstep Hub.

Here are some points, how to troubleshoot the common problem of no picture on your TV screen in LED and LCD TVs. We will be using the flashlight test to help with the troubleshooting while determining the problem.

lg tv repair


The flashlight test will show how to recognize if you have any video appearing on the screen and whether or not you have backlights. Within this test, we will show how to determine if the problem is a bad T-Con board, the bad main board or bad backlight inverters for LCD TVs or LED drivers for LED TVs.

Most of the LCD TVs are made up of
  • Main Board
  • T-Con Board
  • Power Supply Board
  • Backlight Inverters


The number of backlight inverter may differ from one TV to another TV. Some TVs have one backlight inverter or two backlight inverters or the backlight inverter is built into the power supply board.


Most LED TVs will have


  • T-Con Board
  • Power Supply Board
  • Main Board and 
  • LED Driver Board


Some LED TVs will have the LED driver board is built into the power supply board.

Problems:
If you have no picture on your screen, the first thing we want to look at is to see if we have backlights or not. You can do this in a few different ways.

First is by looking through the back of your TV and seeing if you can see white lights shining through holes on the panel.

You can do this in a few different ways


    1.  If you can see white lights shining through the holes on the panel.  Now you can see the backlight is on through the top vent of the TV. If it is too difficult to notice if your backlights are on or not, with the backlight still on, you may need to remove the back cover of your TV and see for the light shining through the panel.


  • Once you have determined if you have backlights that are not working, you can then move on to the next steps.
  • If the backlights are working, but you have no image on the screen, that indicates the problem is either the T-Con board or the Main Board.
2. You want to see if you can hear audio. If you cannot hear audio, once try and remember if you had audio immediately after the TV image went away on the screen. Or you can also cycle through the inputs to see if you can hear any audio on any of the inputs.

For Example, you can connect your cable box to your TV and try to find the input that cable box identifying that it be sending audio to the TV.

  • If you do have audio and you do have backlights, it is recommended to start by replacing the T-Con board as that will be the fix, the majority of the time.
  • If you definitely have no audio and you have backlights, then the problem could either be the T-Con board or the main board. You need to replace each board individually to see which one fixes the problem.
  • If you do not have backlights, you want to turn all the lights off in the room and get a flashlight. Apply power to your TV and press the menu button on your remote to pull up the menu on the screen. You will not able to see the menu until you shine a flashlight on the screen.

Flashlight Test:

You may require twisting the flashlight and trying different angles to be able to see the menu. You can see the menu on the screen and even read the AV1 on the screen. This shows your TV has no backlights, but the image is showing up on the screen, thus our inverter and LED driver is bad and our T-Con and main board are good.

You can turn the menu on and off on your screen to notice that the image appears and then disappears. At this point, you want to replace the inverter or LED driver or the power supply, if it has the inverter or LED driver on it.


Solutions:
So as a concise overview
  • If your TV does have backlights and has audio, it is recommended to replace the T-Con board first.
  • If your TV does have backlights but does not have audio, then it is either a bad T-Con board or main board and each board will need to be replaced individually to see which one fixes the problem. 
  • But you don’t have backlights, but you see an image on the screen with the flashlight, that means that your main board and T-Con board are good and that you will need to replace the backlight inverter or backlight inverter on your LCD TV and the LED driver on your LED TV.

This information will just guide how to diagnose the problem but will not guarantee to fix the issue. If you need to fix the issue consult LG TV Repair Service center.

Monday, September 23, 2019

Refrigerators Common Problems with Solutions

Refrigerators can vary from model to model they all operate on similar principles. Here we will identify the four main factors of refrigerator operation as well as potential problems you may encounter.

·         Refrigeration
·         Temperature control
·         Airflow
·         Defrost


1. Refrigeration

Refrigerators help store food and keep beverages cold by removing the heat from the inside of the appliance. To accomplish this refrigerator uses a sealed system that pumps refrigerants through a set of coils. The system includes a compressor, a pump which compresses the refrigerator in gas form into the condenser coils where the gas is condensed into a hot liquid the condenser coils dissipate the heat as the liquid travels through them. Besides these coils can collect dust, dirt, and hair which prevents the coils from properly dissipate the heat.

If you observe that the refrigerator is not cooling properly the condenser coils may need to be cleaned. Once the refrigerant has passed through the condenser coil and the capillary tube it travels to the evaporator coils which are located in the freezer as the refrigerant liquid enters these coils it expands into gas which makes the coil cold the gas flows through the coils to a suction line attached to the compressor .the compressor converts the gas back into a liquid and then cooling cycle continues.

You can determine if there is a cooling problem with this system by observing the evaporator coils while the refrigerator is running if the system is operating properly there should be a consistent frost pattern on all of the evaporated coils .if only one or two rows contain frost and the rest do not it’s likely that the sealed system has developed a restriction or a leak.

Be aware that any repairs to the system must be performed by a certified technician.

refrigerator service at home

2. Temperature Control

·         The temperature within the refrigerator should be between 35 to 40 degrees   Fahrenheit.
·         The temperature in the freezer must be zero degrees Fahrenheit.

The temperature is maintained by the refrigerator control, depending on the model the control may be a thermostat switch and sensing bulb assembly or electronic control board that works with one or more sensors. Be conscious that some models will have a separate control for the freezer.

To cool about the refrigerator and freezer the control allows the voltage to travel to the start relay and compressor as well as to the condenser fan motor and evaporator fan motor .once the proper temperatures have reached the control shuts off the voltage to the cooling system.

If the refrigerator is not cooling then check the temperature setting by following the user manual book for  endorsed refrigerator and freezer coolness settings and then reset the thermostat accordingly.

Keep in mind that it’s normal for the temperature to vary throughout the cycle.


3. Airflow    

Airflow is vital for refrigerators to work properly to cool the condenser coils the condenser fan draws in air from the front of the appliance sends it through the condenser itself and then circulates the air back out the grill. At the same time, the evaporator fan draws air from the refrigerator into the freezer the air passes through the evaporator coils which removes the heat from the air. The air then flows back into the refrigerator continuing the cycle.
Most models will have damper door to control from the freezer to the refrigerator this damper may be automatically controlled by temperature control or manually controlled by the user.

If the food or beverages in the refrigerator compartment starts to freeze the damper door could be stuck open. if the refrigerator will nor cool properly but the freezer appears to be working the door could be stuck closed or the evaporator fan may have failed and will need to be replaced.


4. Defrost

As we discussed earlier the evaporator coils collect frost as the air from the refrigerator passes through them since frost build-up can cause airflow problems the coils require periodic defrosting older models needed to be defrosted manually but most of today’s models use an automatic defrost system.

The basic components in this system are
  • Defrost heater
  • Defrost thermostat
  • Defrost control

Depending on the model the control may be a defrost  timer or a defrost control board.

A defrost timer sets the heater on for about 25 minutes two or three times a day to prevent the evaporator coils from frosting over.

A defrost control board will also turn the heater on periodically but will regulate more efficiently.

If the control thermostat or heater breaks the evaporator coils will likely frost over causing poor cooling in the refrigerator .you can test both the thermostat and heater for continuity to determine if a continuous electric path is present. if both thermostat and heater test positive for continuity it’s likely that the controller is defective and will need to be replaced.

Refrigerator repair services Contact Doorstep Hub

Wednesday, September 18, 2019

How can I control pests in my house?


The one thing we have never learned to live side by side with is bugs and insects. In summer, especially, our home is often invaded.

Effective way to get rid of insects at home who doesn’t want to keep their house free of pests, unfortunately, chemical pesticides are way too toxic and harmful to be used anywhere near your home family. If these chemicals can kill insects surely they cannot be good for you that why it’s better to use something natural and safe whenever possible.


pest control services


Luckily, there are effective and harmful methods of getting rid of any insect that has taken up residence in your home but before you learn more about them remember.

1.     Cockroaches:

Cockroaches aren’t simply disgusting creature you terrified the spot in your house they can also spread very serious diseases. Cockroaches don’t feel squeamish about eating any sort of food and that includes rotting garbage as a result of these insects appear in your home they can bring in salmonella or gastroenteritis on top of that cockroaches are often cause of an allergy if you want to get rid of these pests there are many products you can get from the store but most of them are usually highly toxic this can especially dangerous if you have small kids or pets instead you can try

The following methods which are cheap, safe and effective.
Remedies
Chop one onion and add one teaspoon of baking soda put this mixture in the corners of your house. Reapply daily and very soon you’ll find your house free of roaches.


2.     TICKS:

Ticks can be astoundingly different in size and color to protect yourself and family. It’s crucial to protect yourself your family and your pets from these little nasties these tiny creatures can spread terrible diseases such as Lyme disease, Rocky Mountain spotted fever, Colorado tick fever, Ehrlichiosis, and tularemia.

Some of these conditions can be fatal if you are not keen on applying chemical pesticide to your skin or your animal’s fur, you can try some natural and safe mixtures

Remedies
Mix 20 drops of rose geranium essential oil, 10 drops of sweetgrass essential oil, 5 drops of lavender essential oil, 5 drops of citronella or lemon essential oil, 1 tablespoon of rubbing alcohol ethanol dilute this mixture with 100ml of vinegar or water and transferred into a spray bottle, shake well and spray on your clothes before going outside.

3.     Rodents:

Best way to prevent rodents from staying in your home is by cleaning up your house in such a way that every possible source of food or crumb that is easily accessible to rodents must be disclosed.

Remedies
After identifying rodents you should do is to set up mouse traps and to identify any entry point in your home. At-home remedies before calling a pest expert (pest control service) do that but remember you have to act quickly don’t wait to get rid of a mouse infestation.

4.     Bed Bugs:

Bed bugs are small oval brownish insects that live on the blood of animals or humans a bed bug pierces through the individual skin and draws blood using its two hollow tubes for 5 minutes.

Remedies
·         In a spray bottle pour one cup of water then add a tablespoon of baking soda and a teaspoon of cayenne pepper and a teaspoon of freshly grated ginger then close the bottle and shake it to mix. Spray this mixture on infected areas this will kill the bugs and their eggs immediately also wash the clothes in other fabric and hot water that came in contact with the infected area.

·         Examine the corner of the mattress regularly, remove clutter from your bedroom and wash your luggage and clothing which you use while traveling with hot water.

Try these home remedies, even though you are facing a problem with these pests you can contact nearby pest control service center.


For more details
Email: help@doorstephub.com
Call: +91-88866 88666
Visit: Doorstep Hub

Common LED TV Problems with Solutions

Present, television is considered as the main source of entertainment and learning for many people, especially the youth. All television pro...